

How to use connect widget feature in KS Wallet
How to Use the Connect Widget Feature in KS Wallet
The Connect Widget feature in KS Wallet allows users to seamlessly connect their wallets using various authentication options and blockchain preferences. This widget simplifies wallet integration for developers and provides a user-friendly experience for decentralized applications. This article provides a step-by-step guide on configuring and using the Connect Widget feature.
1. Introduction to Connect Widget
The Connect Widget in KS Wallet is a fully customizable Web3 wallet widget that supports:
Multiple authentication methods: Google, email, phone, and social media logins.
Wallet integrations: MetaMask, Kalp Wallet, Social Logins.
Blockchain and network selection: Ethereum, Polygon, and more.
Personalized theme options for seamless design integration.
The widget simplifies the wallet onboarding process for decentralized applications.
2. Accessing the Connect Widget
Log in to your Kalp Studio account.
Locate KS Wallet:
From the Dashboard, find the KS Wallet card.
 3. On the left-hand menu, select "Connect Widget" as shown in the dashboard.

3. Configuring the Connect Widget
Step 1: Choose Wallet Type

Navigate to the "Wallet Type" section.

Select the wallets you want to integrate:
Socials (e.g., Google logins).
Kalp Wallet.
MetaMask.
Step 2: Enable Social Login
Under "Social Login", enable options such as:
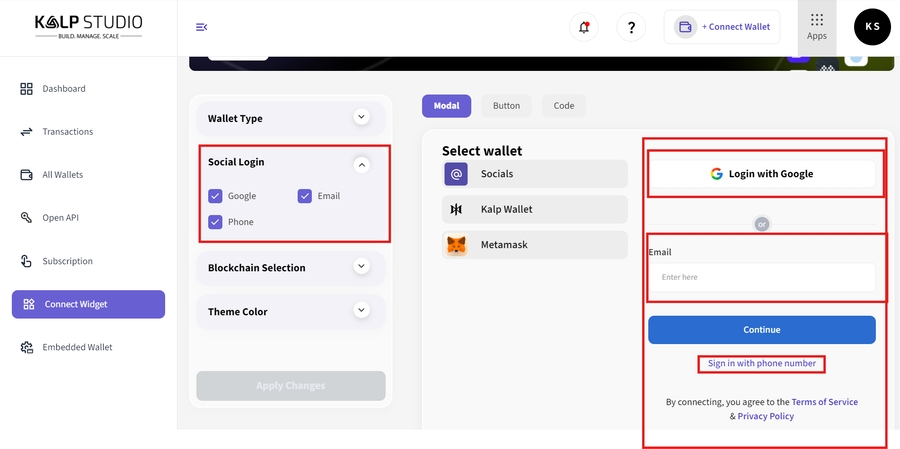
Google Login.
Email Login.
Phone Login.
Users will be able to log in using the selected options.
Step 3: Select Blockchain Options
In the "Blockchain Selection" section, choose supported blockchains such as:
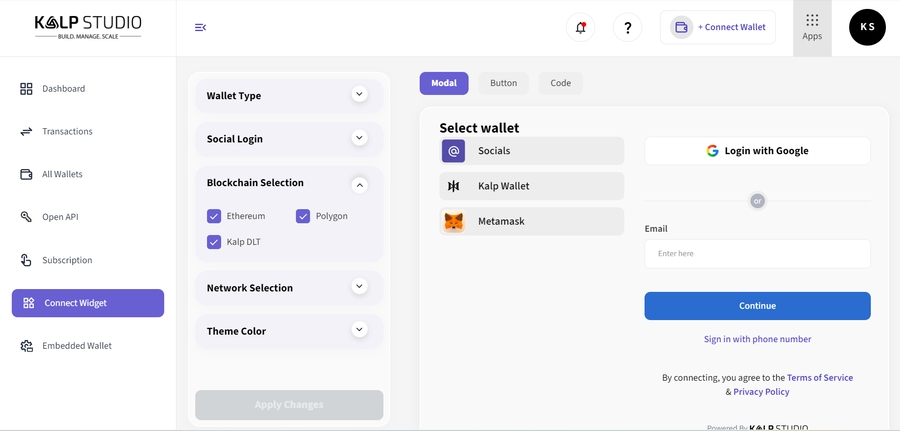
Ethereum.
Polygon.
Kalp DLT.
Customize the blockchain preferences for your wallet integration.
Step 4: Network Selection
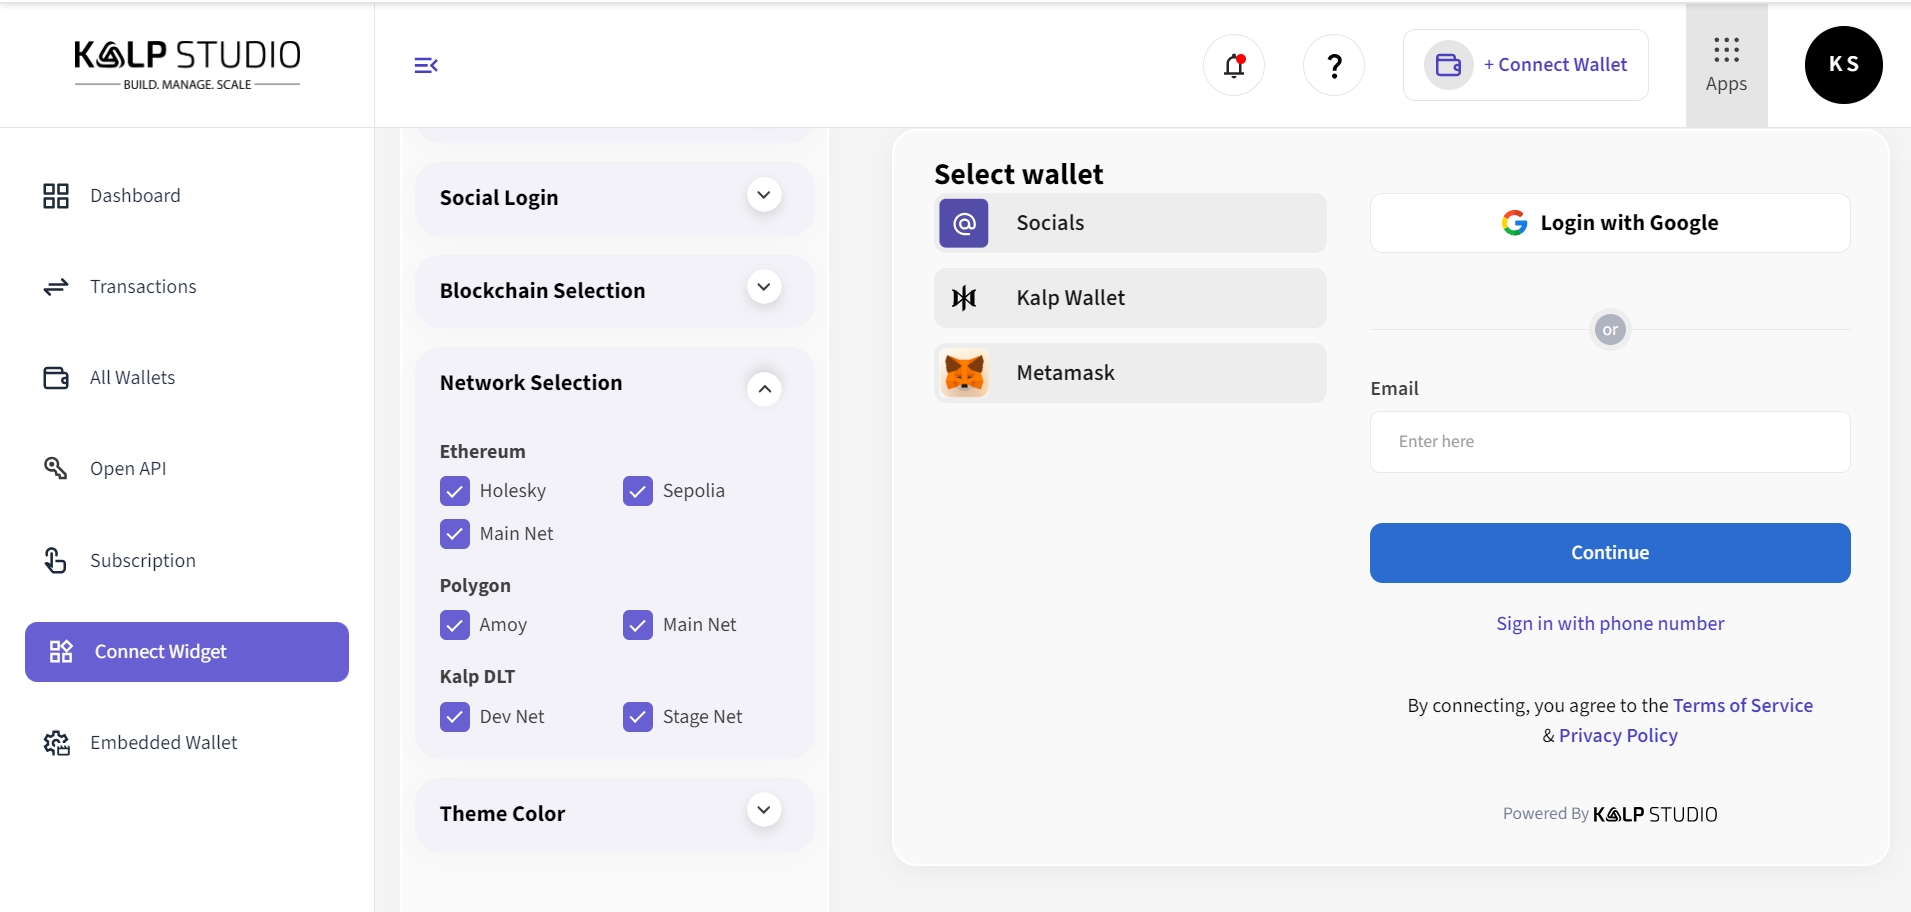
Under "Network Selection", enable preferred networks for each blockchain:
Ethereum: Holesky, Sepolia, Mainnet.
Polygon: Amoy, Mainnet.
Kalp DLT: Dev Net, Stage Net.
This ensures users can operate on their desired blockchain network.
Step 5: Customize Theme Color

In the "Theme Color" section:
Select the background and text color.
Adjust the widget appearance to match your application's theme.
This ensures consistent branding.
4. Selecting and Testing the Widget

On the right-hand side, preview the widget configuration.
Select any wallet type, e.g., Socials, Kalp Wallet, or MetaMask.
Authenticate using your chosen login method (Google, email, or phone).
Click "Continue" to proceed.
5. Code Configuration

The Code option allows you to embed the Connect Widget into your application using a small script.
Steps to Configure the Code:
Navigate to the Code tab under the Connect Widget section.
Choose between the following options:
React Code (for React.js applications)
JavaScript Code (for HTML/JavaScript applications)
Copy the relevant script or integration code:
React Integration: Code for React-based projects.
JavaScript Integration: Script for embedding in a simple HTML file.
Embed the code into your application. The widget will appear, enabling wallet connections.
6. Customize the Button
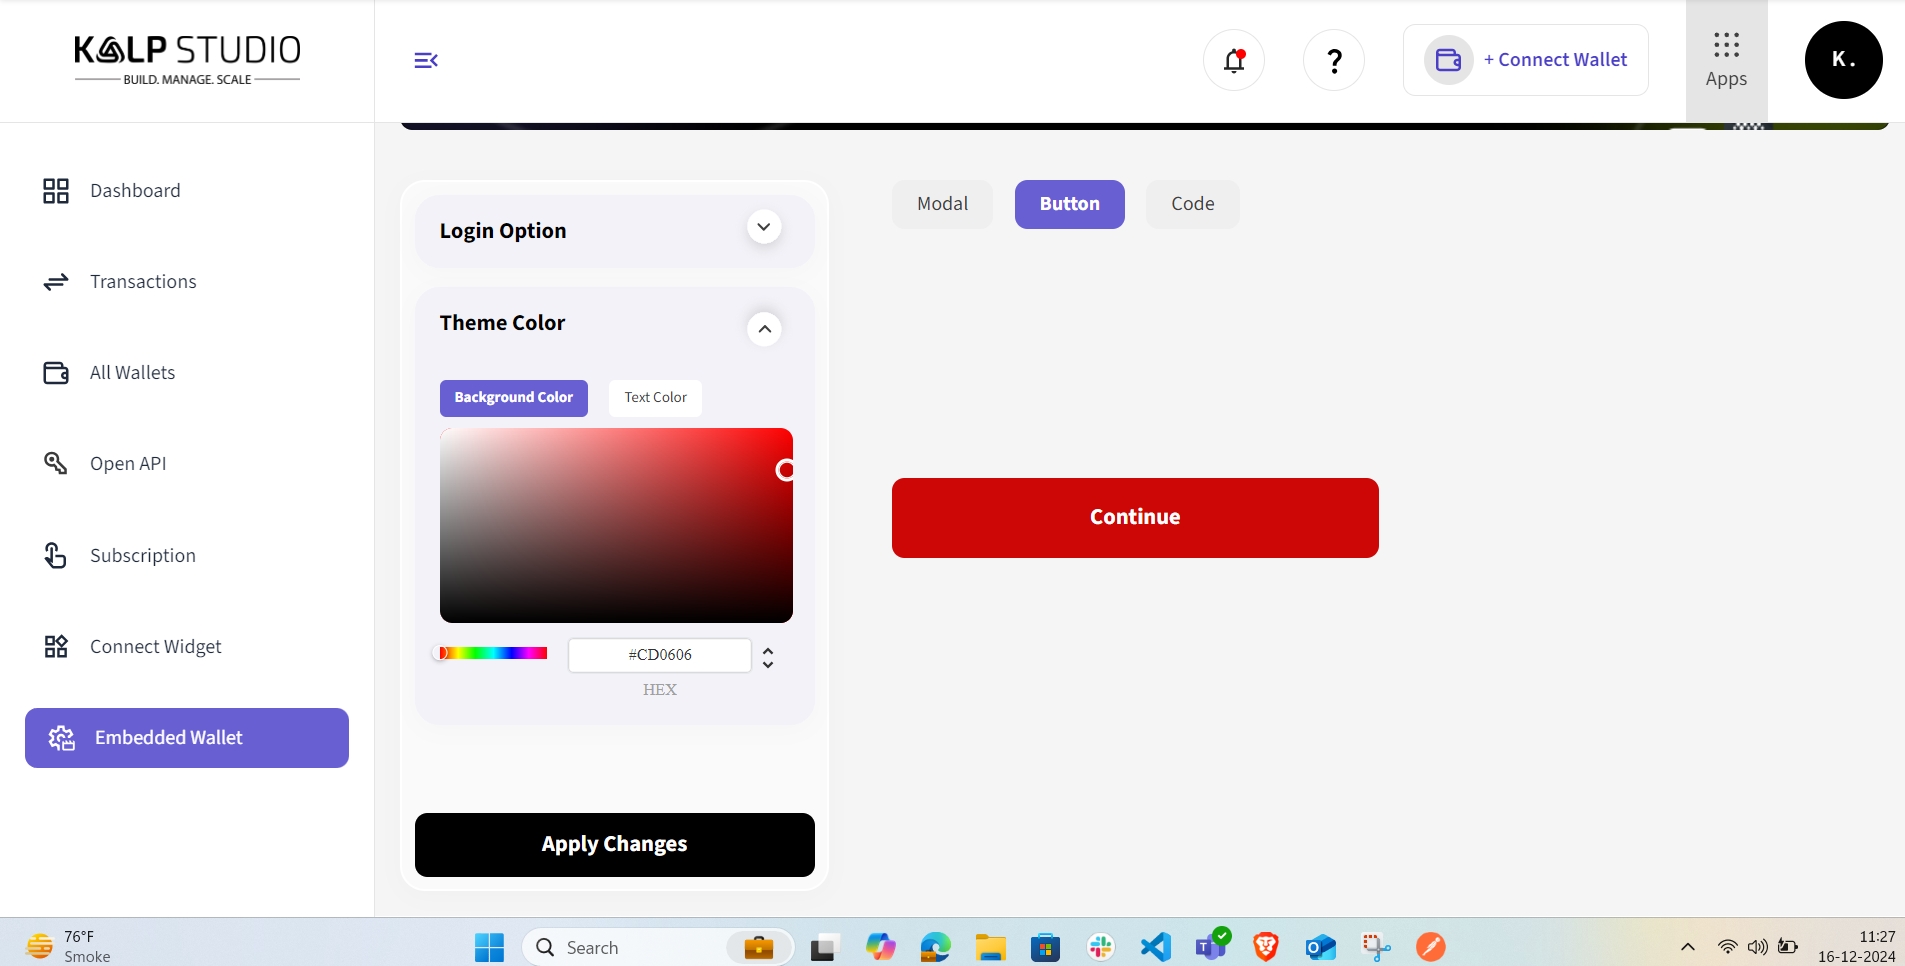
1. Theme Color:
Adjust the Background Color and Text Color to match your brand or application theme.
Use the color picker to set the desired color, or input the HEX code manually.
2. Example:
In the screenshot, the button background is set to a bold red color
#CD0606, creating a prominent "Continue" button.
3. Apply Changes
Once you’ve customized the button’s theme:
Click the Apply Changes button to save your configuration.
The updated button will reflect your changes instantly, as seen in the preview.
4. Use the Button
The button can now be used to trigger wallet connection functionality within your application.
Users will see the styled "Continue" button and can interact with it to connect their wallet seamlessly.
7. Save and Apply Changes
After configuring all the options:
Click "Apply Changes" to finalize your widget.
The widget is now ready to be used and embedded in your application.
Conclusion
The Connect Widget feature in KS Wallet simplifies wallet integration with customizable options for authentication, blockchain selection, and theming. By following the steps outlined in this guide, developers can enhance user onboarding for decentralized applications while ensuring flexibility and ease of use. Whether you're integrating Google login, MetaMask, or Kalp Wallet, the Connect Widget streamlines the process seamlessly.
!!! Note
If you encounter any issues related to Kalp Studio, please raise a support ticket atcare.kalp.studio. Our dedicated development team will assist you in finding the best possible solution.
Last updated